First up is a nice natural lip balm. I purchased my lip balm supplies from a company called Starrville, but there are many other wonderful companies out there. And for those of you who have no interest in making lip balms, but want a way to jazz up a tube of what you buy at the store, this project works for you too!
You will need:
Cocoa Butter - I prefer the undeordorized kind because I like the smell of cocoa
Beeswax - I use the pellets
Vitamin E oil - I just buy the natures own gel capsules and squeeze the Vitamin E out
Microwaveable glass dish - I prefer my glass measuring cup
Stainless steel spoon - for stirring
Lip Balm containers - For this project I've used lip balm tubes, but you can jazz up small pots too.
You will notice that you can click on the ingredients and I've linked them to what I've used so that you can get a visual of what I'm talking about.
Now for my recipe:

1 tbsp cocoa butter
2 tbsp parts beeswax
4 vitamin E oil capsules
6 Lip Balm containers
I mix all of the ingredients together in my glass container and microwave the mixture at 1 minute intervals until fully melted. After each 1 minute interval I stir using my stainless steel spoon.

*CAUTION - be careful when removing your glass container from the microwave as it does get VERY hot. Use an oven mit :)

Once the mixture is mixed all the way I put my containers in a row and fill them up to the top. There will be a small mixture of your lip balm left over when you are done. That is fine because you want to be able to add the mixture to your containers once they have cooled. You will see when the mixture cools it sinks in the middle. That is what this leftover is for!
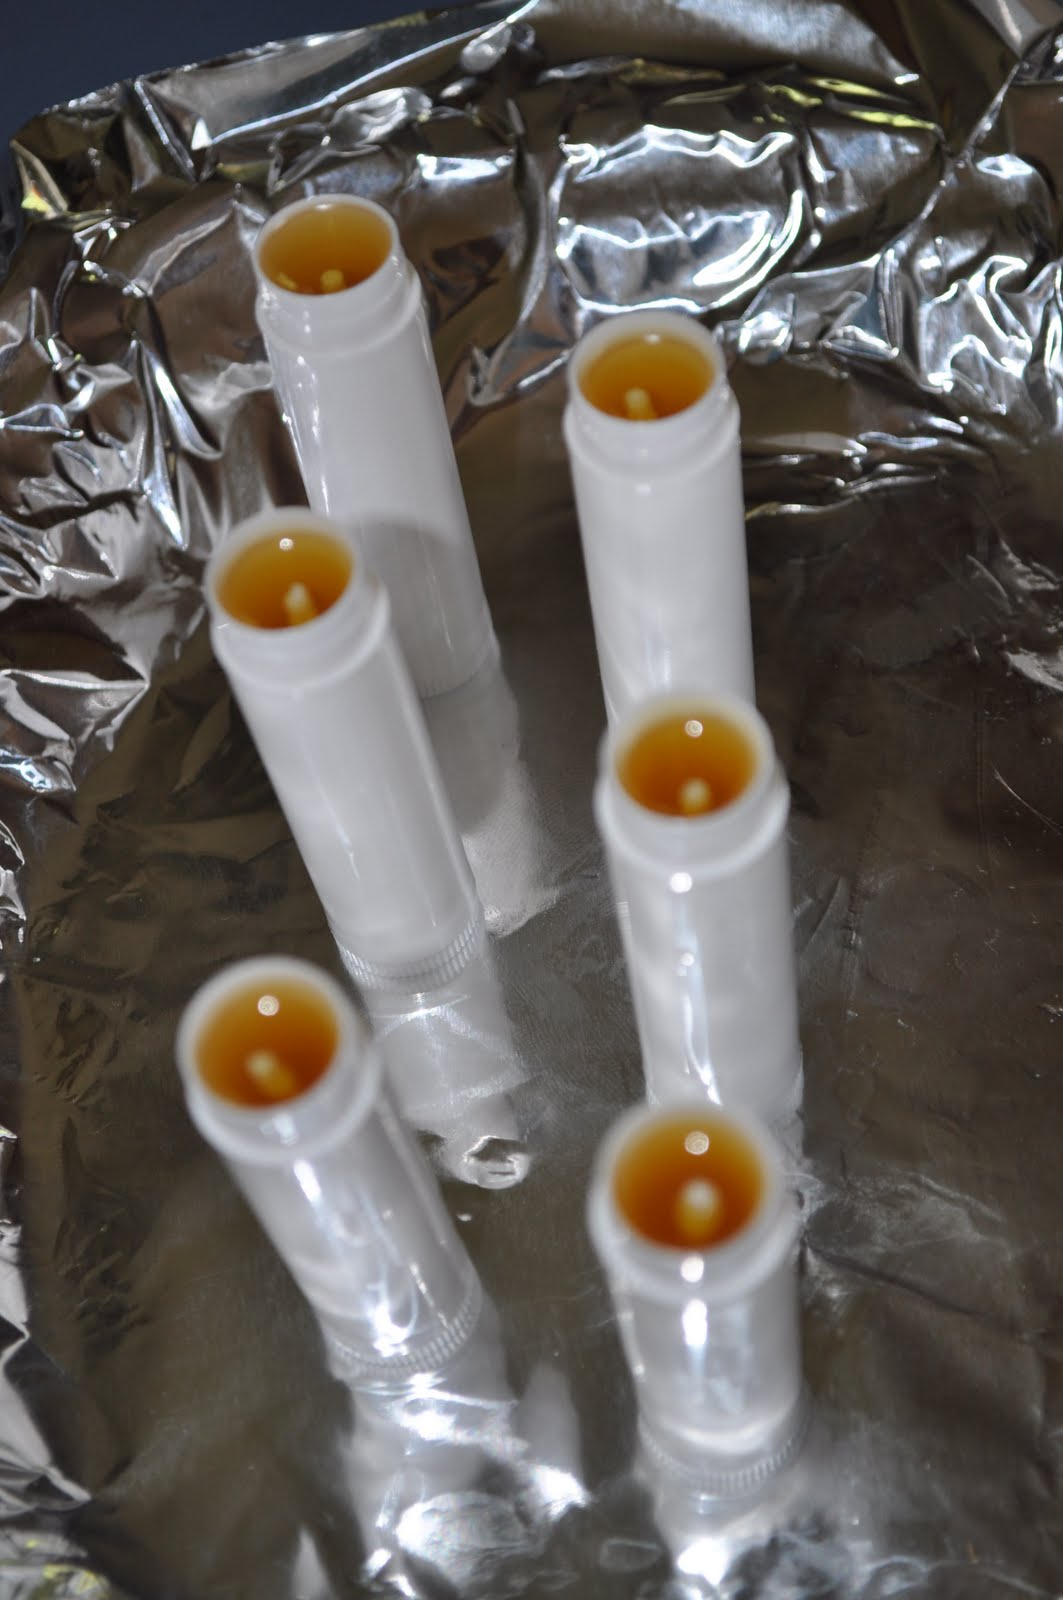
You will notice as your containers start to cool and your lip balm is setting it goes from a translucent color to a solid non see through color. GREAT!

Once your containers are fully cooled down, place lids on them. Now it's time to pull out your Close To My Heart Supplies and make it CUTE! Move on over to my Part 2 blog post now!

No comments:
Post a Comment